


Isolated away from the burial lots, on land reserved for a future celebration and reception centre, you’ll find our active veggie patch. Whatever the garden produces we share with families and visitors, and the local Food Bank. Equally isolated away is a gardener, with a passion for problem solving and for teaching folks how to grow stuff.
Veggie Program
Meet Stan
Sharing Seeds of Change
You’ll find nothing goes to waste in Stan’s garden; each year he hand-picks and scrutinizes each seed from the crop before packing it into tiny envelopes to share with willing gardeners, amateur and pro alike! We believe that growing our own food is part of planning a sustainable future.
Stan is busily preparing the seeds for our 2022 growing season. Please drop by the cemetery to pick up a packet or two of Stan’s Seeds. Identification & growing instructions below!
GROWING INSTRUCTIONS
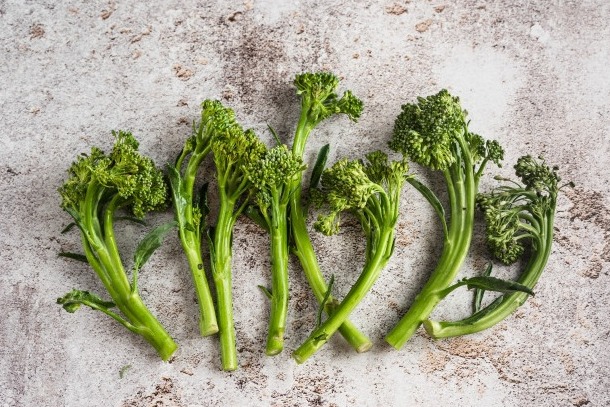
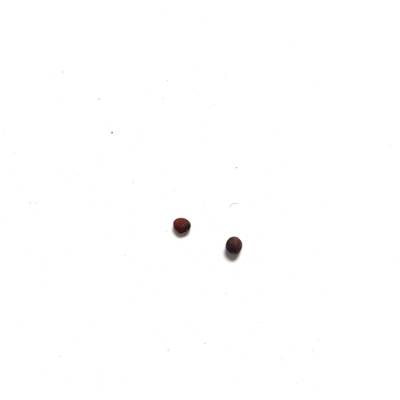
Broccolini
The seed is a dark brown or black little round shape. It is a cool weather crop and can yield one or more main harvests and many mini harvests through the growing season. As it is a cool weather crop, it can do well in partial shade, so provide a location accordingly for best growing result and flavour.
- Plant seeds about 20 cm apart (8 inches) about 4 weeks before the last frost date. Thin when plants are 8-10 cm (4 inches) high to 60 cm apart (24 inches).
- If you wish, you can start seeds indoors about 7 weeks before the last frost in a small (7 cm/3 inch) pot filled with potting soil. Keep soil moist yet do not over water. Acclimatize young plants (when 10 cm/4 inches tall) by setting outside for 2 or 3 hours each day around Noon, before transplanting outdoors. Plant about 5 cm (2 inches) deeper than they were in the pots, ensuring that the soil is moist and firmly packed around the roots.
- Fertilizing with a natural fertilizer as a mulch around the plant base will assist in keeping moisture in the soil, while keeping the soil from being over compacted, and provide nutrients to boost the ‘fruit’ production. Ensure the soil is kept moist but not wet; allow soil to dry out on top in between watering.
- Every week or two, remove the mulch and gently cultivate the soil around the plant, pulling out any weeds that will steal nutrients from the soil. Replace the mulch. Harvest the broccolini by snipping the green ‘fruit’ growth, as shown, below the first leaf. Harvest regularly or the fruit will turn to flowers and go to seed. Happy growing.
”Your soil should have lots of natural organic matter, and good drainage.
- Stan
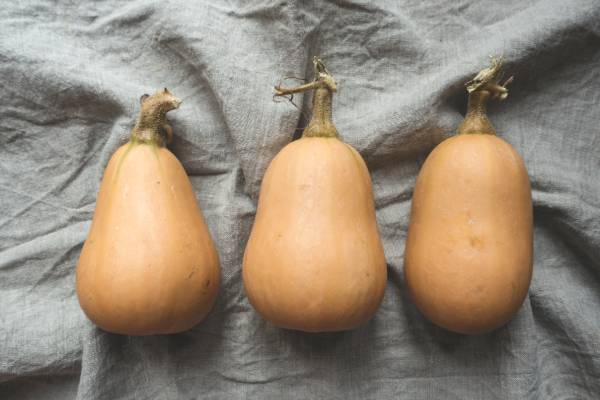
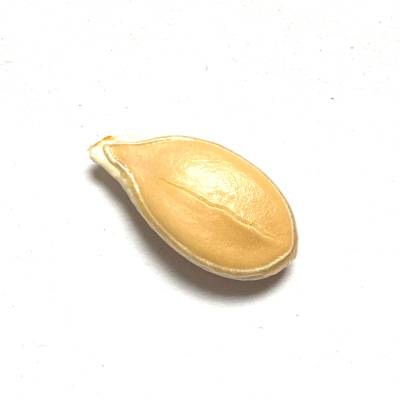
Buttercup Squash
Buttercup is a very rich sweet squash which is best baked. It can be picked once the vines start to wither, and then should be stored in a cool dry cellar or cold room.
- Plant seeds about 20 cm apart (8 inches) about 4 weeks before the last frost date. Thin when plants are 8-10 cm (4 inches) high to 60 cm apart (24 inches).
- If you wish, you can start seeds indoors about 7 weeks before the last frost in a small (7 cm/3 inch) pot filled with potting soil. Keep soil moist yet do not over water. Acclimatize young plants (when 10 cm/4 inches tall) by setting outside for 2 or 3 hours each day around Noon, before transplanting outdoors. Plant about 5 cm (2 inches) deeper than they were in the pots, ensuring that the soil is moist and firmly packed around the roots.
- Fertilizing with a natural fertilizer as a mulch around the plant base will assist in keeping moisture in the soil, while keeping the soil from being over compacted, and provide nutrients to boost the ‘fruit’ production. Ensure the soil is kept moist but not wet; allow soil to dry out on top in between watering.
- Every week or two, remove the mulch and gently cultivate the soil around the plant, pulling out any weeds that will steal nutrients from the soil. Replace the mulch. Harvest the broccolini by snipping the green ‘fruit’ growth, as shown, below the first leaf. Harvest regularly or the fruit will turn to flowers and go to seed. Happy growing.
”Your soil should have lots of natural organic matter, and good drainage.
- Stan
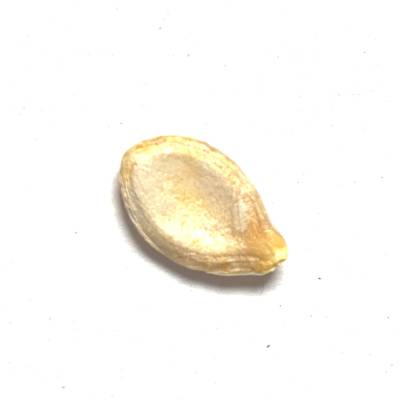
Butternut Squash
A popular winter squash that stores well.
This Squash can be baked, roasted, steamed and is great for soups, tarts, and even pies. It can be picked after the skin has turned a light to tawny brown, and will keep well in a cool dark place.
- To plant the seeds, first create a hill that is 45 cm (18 inches) long and 25 cm (10 inches) wide and 15 cm (6 inches) high that is rich in nutrients.
- Plant the seeds outdoors the May long weekend, in an area with direct sunlight, about 15 cm (6 inches) apart and 3 cm (1 inch) deep along the top of the hill. (As the maturation is a long one, you may wish to start indoors about 3 weeks prior to the long weekend; condition them as above, and then transplant outdoors on the long weekend.)
- Keep the soil moist but not saturated; it helps to have some mulch around the seed covering the hill to keep moisture in the soil. Keep weeds away from the plant and fertilize organically every month. You may wish to research how to pollinate the flowers to ensure the best success and limit each plant to no more than 10 squash.
”The plants require a lot of space; provide sufficient room for the vines to grow 5 metres (16 feet). Harvest the Butternut before the first heavy frost or the squash may be damaged and will spoil easily.
- Stan
Hubbard Squash
A sweet, flavourful and versatile squash.
Another Winter squash which is rich in flavour and can be used so many ways: cooked or baked peeled or unpeeled, and boiled, roasted, steamed, sautéed, or pureed, and also makes a great pie.
- To plant the seeds, first create a hill that is 60 cm (24 inches) long and 25 cm (10 inches) wide and 15 cm (6 inches) high that is rich in nutrients.
- Plant the seeds outdoors the May long weekend, in an area with direct sunlight, about 20 cm (8 inches) apart and 4 cm (1 1/2 inch) deep along the top of the hill.
- Keep the soil moist but not saturated; it helps to have some mulch around the seed covering the hill to keep moisture in the soil. (As the maturation is a long one, you may wish to start indoors about 3 weeks prior to the long weekend; condition them as above, and then transplant outdoors on the long weekend.)
MASTERCLASS
Keep weeds away from the plant and fertilize organically every month. You may wish to research how to pollinate the flowers to ensure the best success and limit each plant to no more than 4 squash.
The plants require a lot of space; provide sufficient room for the vines to grow 8 metres (25 feet).
Harvest the squash before the first frost as frost will damage the outer skin and then they will not store well. Seeds saved from the Hubbard are resilient and can be set out to dry and saved for future planting.
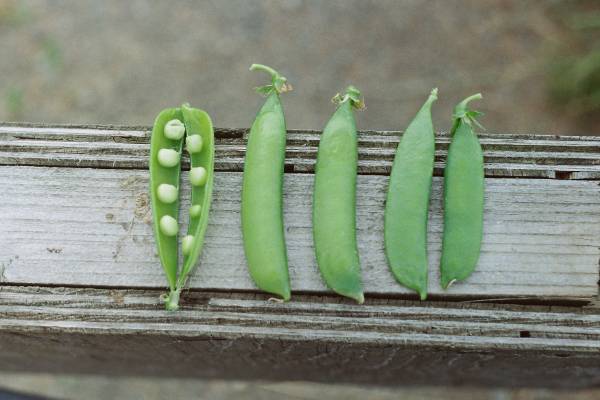
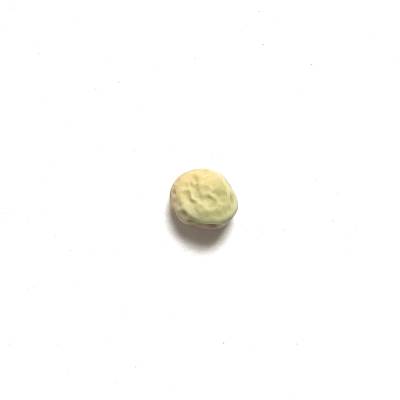
Pea
Makes a nice light snack straight from the shell.
- Before planting, soak peas overnight in tepid water as it improves germination.
- In mid-April, plant seeds with direct sun exposure 2.5 cm (1 inch) deep and about 10 cm (4 inches) apart in soil that drains well. (If April is overly wet, consider piling up the earth about 10 cm (4 inches) to form the row to plant in.) Space rows about 40 cm (16 inches ) apart. Provide some light mesh wire for plants to use as support as they grow.
- Check seeds after planting, as some may get washed out to the surface with rain and need to be re-planted; just make a small hole with a stick and push the seed down gently into the hole and cover.
- Weed around plants gently by hand as they have shallow roots. Peas provide nitrogen for the soil, yet need potassium and phosphorus, so compost soil will help them thrive. Plants require moderate amounts of water; do not soak.
- Once flowers bloom, peas mature quickly; check daily to keep peas well picked so more pods grow. (Use two hands when you pick peas to avoid plant damage; one hand to secure the vine and the other to pull the pea off.)
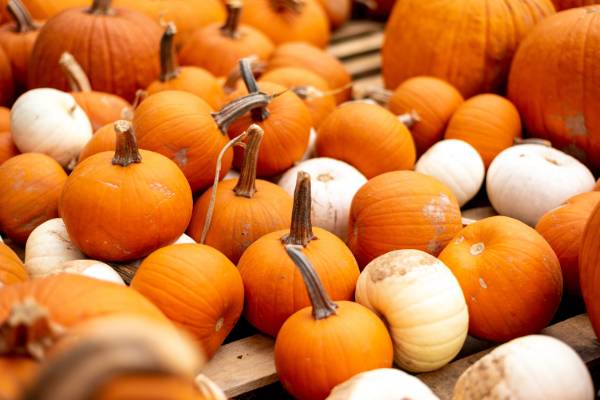
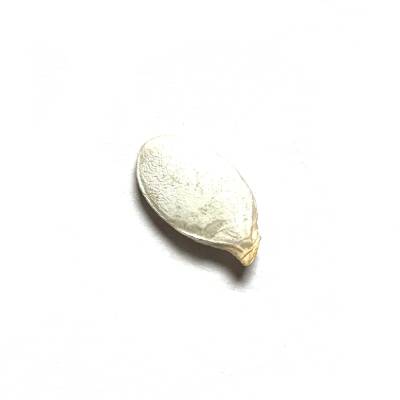
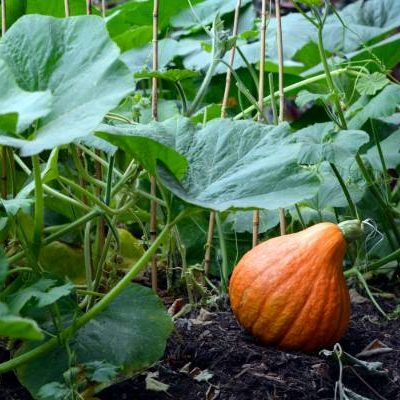
Pumpkin
A classic Jack-O-Lantern for Halloween, or roast it for soup or pie
Pumpkin is fun to grow as you never know what size they will end up when finished growing.
- To plant the seeds, first create a hill that is 60 cm (24 inches) long and 25 cm (10 inches) wide and 15 cm (6 inches) high that is rich in nutrients.
- Plant the seeds outdoors the first week of June, in an area with direct sunlight, about 20 cm (8 inches) apart and 4 cm (1 1/2 inch) deep along the top of the hill. Keep the soil moist but not saturated; it helps to have some mulch around the seed covering the hill to keep moisture in the soil.
- Keep weeds away from the plant and fertilize organically every three weeks. You may wish to research how to pollinate the flowers to ensure the best success and limit each plant to no more than 4 pumpkins.
- The plants require a lot of space, a lot of water, and a lot of fertilizer; provide sufficient room for the vines to grow 9 metres (30 feet). Consider planting Marigolds around your pumpkin to protect them from squash bugs.
- Harvest the pumpkin before the first frost as frost will damage the outer skin; store in a cool dry location until Halloween. Pumpkins do not keep well in storage so use up before they spoil.
Seeds saved from the pumpkin are resilient and can be set out to dry and saved for future planting.
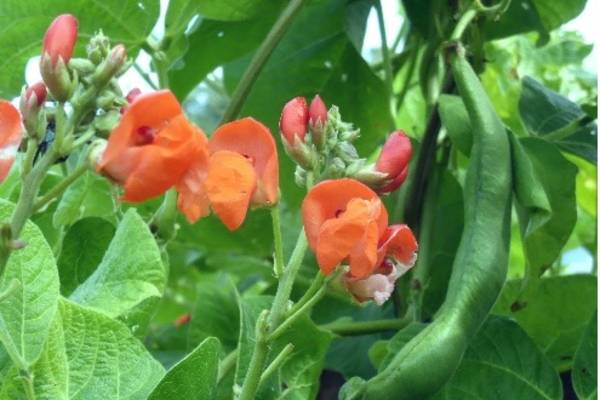
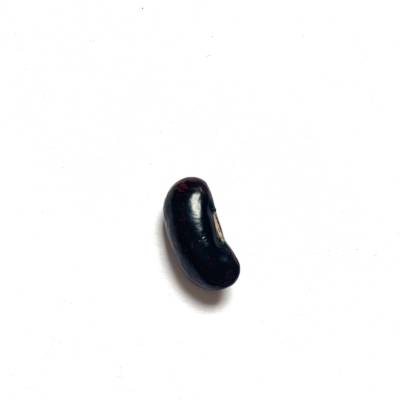
Scarlet Runner Bean
Grows through the summer with lovely orangey-red flowers.
Scarlet Runners seeds are large kidney shaped and are a black and dull pink speckled colour. They love to climb and will need a vine or post to help them, although they do not need to be tied as they wrap themselves around whatever they can.
- Plant seeds in mid-May, about 8 cm (3 inches) apart in good organic soil with full sun exposure. Water regularly and frequently throughout the growing season yet do not saturate the soil.
- Early bean shoots are a favourite of slugs, so consider placing a bottomless large yogurt container around each bean you plant to save it from being eaten as it starts to grow.
- Harvest beans when they are 15-18 cm (6-7 inches) long for best eating.

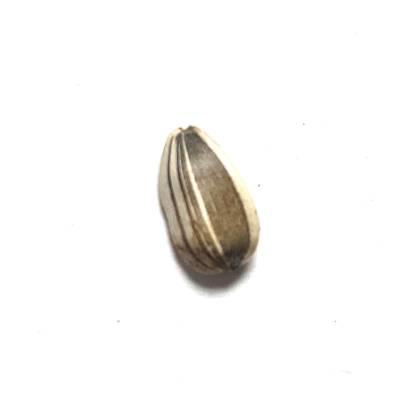
Sunflower
Sunflowers are heliotropic, ie; they turn their flowers to follow the travel of the Sun through the sky east to west, and then revert at night to face the east, ready for the morning sun (they do this prior to their heads filling up with seeds).
THE BASICS
Plant seeds in mid-May with direct sun exposure 3 cm (1.25 inch) deep and 20 cm (8 inches) apart, in rows 75 cm (30 inches) apart. The soil should be loose with lots of organic matter and drain well. (If need be, loosen up the soil to a depth of 60 cm (24 inches) before planting.)
- Water regularly when young, but not directly at base of plant. Protect from slugs. Once plant is 30 cm (12 inches) high, create a moat 20 cm (8 inches) parallel to the row and water the moat heavily once a week; fertilize the moat every month.
- Plants are likely to need support as they reach heights over 200 cm (6 feet). As the seeds mature, you may wish to tie a cover over them such as a light fabric to protect them from birds.
- For harvest, let the flower dry on or off the stem. It is ripe when the back of the head turns brown, the foliage turns yellow, and the petals die down. The seeds should look plump and start to loosen. Another way is to cut the flower head early and hang the heads upside down indoors until the seeds are dry; pick a place that’s safe from birds and mice.
- To remove the seeds simply rub your fingers over the seeded area and pull them off the plant, or you can use a spoon. Rinse sunflower seeds before laying out to dry for several hours or overnight.
- If you’re saving seeds to replant, ensure they are well dried and then store them in an airtight container in a cool, dry place until ready to plant.
- Roasting: Re-soak seeds in salt water for about 12 hours. Pour off water; lie them on a towel to dry. Place in a bowl; add 1 tsp Olive oil and ¼ tsp Salt for every cup of seeds, and stir to mix in. Spread evenly on a baking sheet and bake for 35 minutes at 300 degrees. Turn seeds frequently during the baking. They are done when they appear slightly browned. Enjoy!!